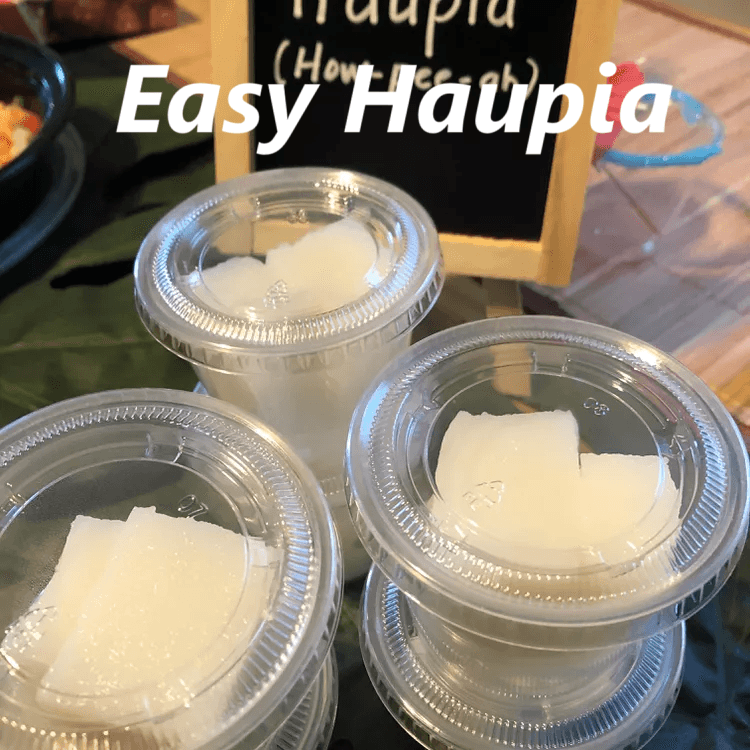
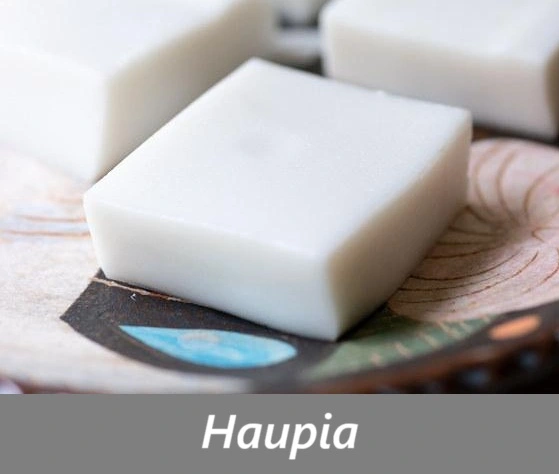
Creamy Hawaiian Haupia: A Coconut Dessert Paradise
Welcome to a tropical escape for your taste buds! Today, I’m sharing my authentic Hawaiian Haupia recipe – a silky, coconut-based dessert that’s both elegant and surprisingly simple to make. This traditional Hawaiian treat features the perfect balance of sweetness and coconut flavor, setting it apart from ordinary desserts. As someone who spent summers in Hawaii visiting family, I’ve perfected this recipe over years of practice, ensuring it delivers that authentic island experience with every bite.
What makes Haupia truly special is its versatility. While it stands beautifully on its own as a light, refreshing dessert, it also pairs wonderfully with tropical fruits or as a unique topping for other desserts. The best part? You only need four basic ingredients and about 30 minutes of preparation time to create this crowd-pleasing dessert that will transport your family straight to the shores of Hawaii.
Many readers have compared this Haupia to my popular Coconut Cream Pie recipe, but Haupia offers a firmer texture and more pronounced coconut flavor that coconut enthusiasts particularly appreciate. The simplicity of this recipe makes it perfect for both weeknight treats and special occasions when you want something impressive without spending hours in the kitchen.
By the end of this post, you’ll have mastered a dessert that brings the spirit of aloha right to your dining table. So gather your ingredients and prepare for a delightful culinary journey to the Hawaiian islands!
What is Haupia?
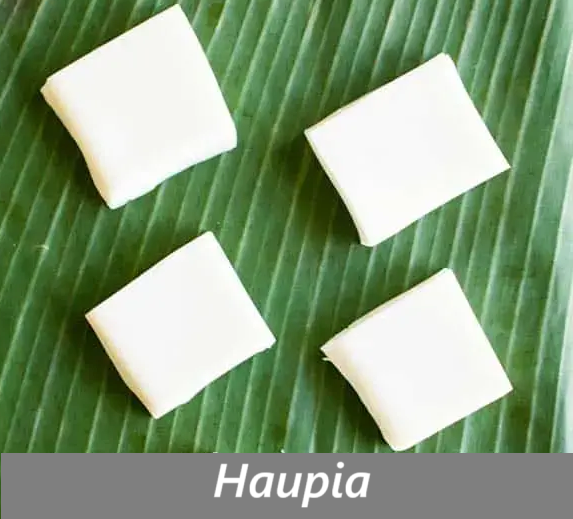
Ever wondered what dessert Hawaiians enjoy when they’re basking in that perfect island sunshine? Meet Haupia (pronounced how-pee-ah), the traditional coconut milk-based dessert that’s been delighting locals and visitors alike for generations! This delightful square of coconut goodness sits somewhere between a pudding and a gelatin dessert, with a firm yet creamy texture that simply melts in your mouth.
The name “Haupia” comes from Hawaiian words relating to coconut cream, which perfectly describes this coconut-laden treat. As my grandmother used to say, “The way to a Hawaiian’s heart is through a perfectly set Haupia!” While traditionally served at luaus and special gatherings, this dessert has found its way into everyday Hawaiian life – appearing at family dinners, potlucks, and even as wedding cake fillings! Ready to bring some island magic to your kitchen? This Haupia recipe is calling your name!
Why You’ll Love This Haupia:
This classic Hawaiian Haupia will quickly become your go-to dessert for so many reasons. First and foremost, its silky texture combined with rich coconut flavor creates a melt-in-your-mouth experience that’s simply irresistible. The subtle sweetness balances perfectly with the natural coconut flavor, creating a dessert that feels both indulgent and refreshingly light at the same time.
Making Haupia at home saves you significantly compared to purchasing it from specialty bakeries or Hawaiian restaurants. Using just four simple ingredients – coconut milk, sugar, cornstarch, and water – you can create an authentic tropical dessert for a fraction of what you’d pay elsewhere. Plus, one batch makes enough to serve a small gathering, making it economical for entertaining.
What sets this Haupia apart is its versatility and pure coconut flavor. Using quality full-fat coconut milk ensures a delicious, authentic taste without artificial flavors. You can customize your Haupia by adding tropical fruit toppings like fresh mango or pineapple, sprinkling toasted coconut flakes on top, or even drizzling with a bit of chocolate for a modern twist on this classic dessert.
If you enjoy this coconut treat, you’ll also love my Coconut Cream Pie recipe that features similar flavors in a different form. Why not make both and create a coconut-themed dessert table for your next gathering? Your family and friends will be impressed with your knowledge of Hawaiian cuisine!
How to Make Haupia:
Quick Overview
This traditional Hawaiian coconut dessert comes together with minimal effort but delivers maximum flavor. The combination of coconut milk with just the right amount of sweetness creates a dessert that’s both satisfying and refreshing. With only 15 minutes of active preparation and about 2 hours of chilling time, you can transport your taste buds to Hawaii without leaving your kitchen. The result is a perfectly set, sliceable coconut dessert that’s elegant in its simplicity.
Key Ingredients for Haupia:
- 2 cans (13.5 oz each) full-fat coconut milk
- 5 tablespoons cornstarch
- 5-6 tablespoons granulated sugar (adjust to taste)
- 1/4 teaspoon salt
- 1/2 cup water
- 1/2 teaspoon vanilla extract (optional)
- Toasted coconut flakes for garnish (optional)
Step-by-Step Instructions:
- Prepare your pan: Line an 8×8 inch baking dish with parchment paper, leaving some overhang on the sides to easily lift the Haupia out later. This step is crucial for clean removal and perfect serving.
- Mix cornstarch solution: In a small bowl, whisk together the cornstarch and water until completely smooth with no lumps. This mixture will thicken your Haupia, so ensuring it’s lump-free now prevents texture issues later.
- Combine main ingredients: In a medium saucepan, pour in the coconut milk, sugar, and salt. Stir gently over medium-low heat until the sugar completely dissolves, about 3-4 minutes. Don’t let the mixture boil at this stage.
- Add cornstarch mixture: Once the sugar has dissolved, slowly whisk the cornstarch solution into the coconut milk mixture. Ensure you’re constantly whisking during this step to prevent any lumps from forming.
- Cook until thickened: Continue cooking the mixture over medium heat, whisking constantly. As the mixture heats, it will gradually thicken. This process takes about 5-7 minutes. You’ll know it’s ready when the consistency resembles thick pudding and can coat the back of a spoon.
- Test for doneness: To check if your Haupia mixture is properly thickened, dip a wooden spoon into the mixture and run your finger through the coating on the back of the spoon. If the line stays clean and the mixture doesn’t run back together, it’s ready.
- Add vanilla (if using): Remove from heat and stir in the vanilla extract if desired. While not traditional, it adds a pleasant aromatic dimension to the coconut flavor.
- Pour and set: Immediately pour the hot mixture into your prepared pan, using a spatula to ensure an even layer. Tap the pan gently on the counter a few times to release any air bubbles.
- Cool and refrigerate: Allow the Haupia to cool at room temperature for about 30 minutes, then transfer to the refrigerator. Chill for at least 2 hours, or preferably 4 hours until completely set and firm.
- Serve: When ready to serve, lift the Haupia out of the pan using the parchment paper overhang. Place on a cutting board and cut into 16 equal squares with a sharp knife. For the cleanest cuts, wipe your knife between slices. Garnish with toasted coconut flakes if desired.
What to Serve Haupia With:
Haupia’s clean coconut flavor makes it an excellent canvas for pairing with complementary foods and beverages. For a traditional Hawaiian plate lunch dessert experience, serve Haupia squares alongside fresh tropical fruits like pineapple, mango, or papaya. The contrast between the creamy dessert and juicy fruits creates a delightful texture and flavor combination.
For an elevated dessert presentation, pair Haupia with a drizzle of dark chocolate sauce or a sprinkle of toasted macadamia nuts. Coffee lovers will appreciate how a cup of freshly brewed Kona coffee balances the sweetness of the Haupia with its rich, slightly bitter notes.
To create a full Hawaiian-themed meal, serve Haupia as the dessert following traditional dishes like Kalua pork, lomi lomi salmon, or poke bowls. For special occasions, consider using Haupia as a layer in coconut cakes or as a filling between shortbread cookies for unique Hawaiian-inspired treats.
Top Tips for Perfecting Haupia:
Use full-fat coconut milk: This is crucial for achieving the proper texture and flavor. Light coconut milk contains too much water and not enough fat, resulting in a less flavorful and potentially too-soft Haupia. For the richest result, use canned coconut milk rather than the refrigerated beverage version.
Master the cornstarch ratio: The cornstarch is what gives Haupia its signature firm yet creamy texture. If your Haupia doesn’t set properly, you likely didn’t cook it long enough or used insufficient cornstarch. Conversely, too much cornstarch can make it rubbery. Follow the measurements precisely, and remember that the mixture should coat the back of a spoon and be quite thick before pouring.
Consider these substitutions: If cornstarch isn’t available, you can substitute with arrowroot powder in equal amounts for a similar effect. For a vegan version, simply ensure your sugar is vegan (some are processed with bone char). If you prefer less sweetness, reduce the sugar to 4 tablespoons without affecting the texture.
Prevent skin formation: If you’re not serving the Haupia immediately after chilling, place plastic wrap directly on the surface before refrigerating to prevent a skin from forming on top.
For chocolate variation: To make chocolate Haupia, add 3 tablespoons of unsweetened cocoa powder to the coconut milk mixture before heating and increase sugar to 7 tablespoons to balance the bitterness.
Storing and Reheating Tips:
Properly stored Haupia will maintain its quality and delightful texture for several days. To store leftovers, cover the Haupia squares tightly with plastic wrap or transfer them to an airtight container. When refrigerated, Haupia stays fresh for up to 5 days, making it an excellent make-ahead dessert for gatherings or weekly meal planning.
Unlike many desserts, Haupia doesn’t freeze well due to its cornstarch base. Freezing changes the texture, causing it to become grainy when thawed. For this reason, I recommend making only what you can consume within the 5-day refrigeration window.
Haupia is traditionally served chilled and doesn’t require reheating. In fact, heating would cause it to lose its set texture and return to a pudding-like consistency. For the best experience, remove Haupia from the refrigerator about 10-15 minutes before serving to take the edge off the chill while still maintaining its firm texture.
If you’ve stored Haupia squares stacked together, they might stick slightly. To separate them cleanly, use a thin knife dipped in warm water between the layers. This simple technique helps maintain their perfect square shape when serving.
End your meal on a sweet note with one of our irresistible(desserts), from classic treats to unique creations.
📌 Follow us on Facebook for more delicious recipes: Facebook Page